29 March 2009
Sunday Run to the Border
**The following ride report is loosely based on
actual events. By loosely, I mean not
really.
Niehart and the Bandit
It started with a simple problem: my stash of 222's ran out, and with CFR around the corner, I needed to stock up. But bringing over-the-counter pain medication from Canada back to the states is frought with challenges: there is 1 bottle, 50 pill limit. I needed more, and I needed them Sunday.
What to do, what to do?
Good thing I was watching CMT; they were running a tv marathon that gave me an idea:
[Hint: the rest of the story works much better if you push play and listen to the soundtrack while reading]
A plan was hatched: make a dash to the border, get the stash, and make it back in time to enjoy drinks. But we needed a crew to run interference, and more important, we needed a chase bike. The route would be long and perilous, with mounties and smokies at every twisty. I went to bed hopeful but restless.
The next morning, Taff the Brit showed up with another delightful British couple. Could they be the Bandit?
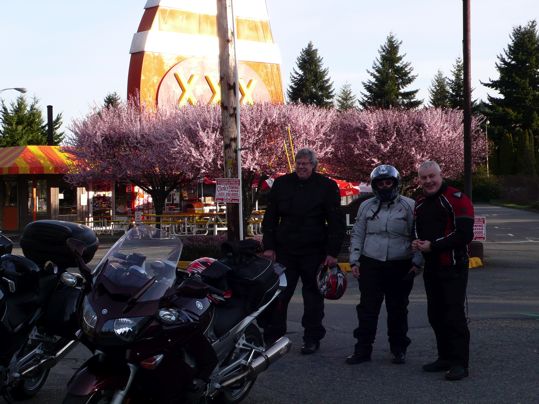
We all know that Brits can't drive on the right side of the road. Too conspicuous. No dice. I'd have to wait to see who showed at the meetup:
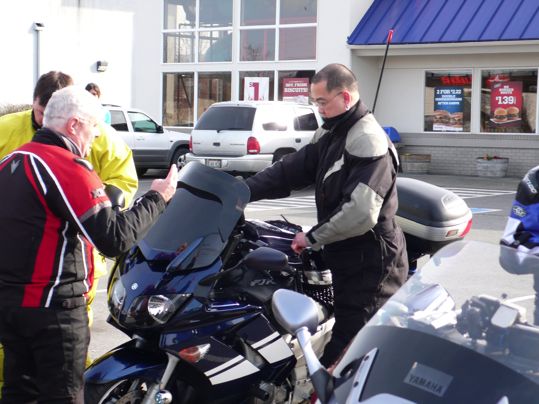
One look at Achiu's multi-farkled heaviy laden Feejer and it was clear that he wasn't going to be the chase car. No, he'd be Snowman, responsible for getting the goods home safe.
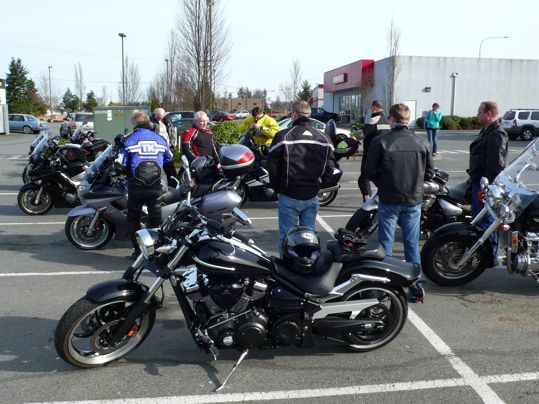
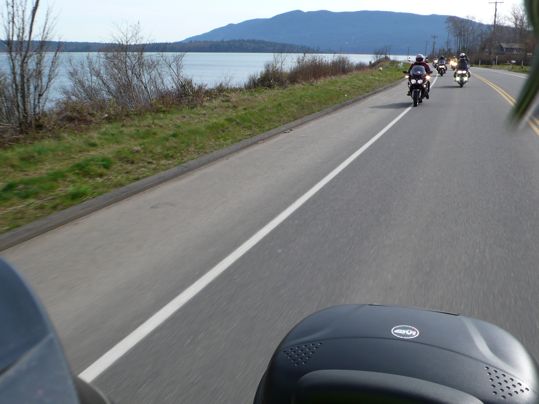
And these guys weren't going to be of any help. Cheezus, who invited cruisers? (Oh wait, I did. I guess they would be useful in slowing down any pursuing Smokeys.)
What I needed was someone cool enough to not crack under pressure, but hooligan enough to run flat out if we got busted.
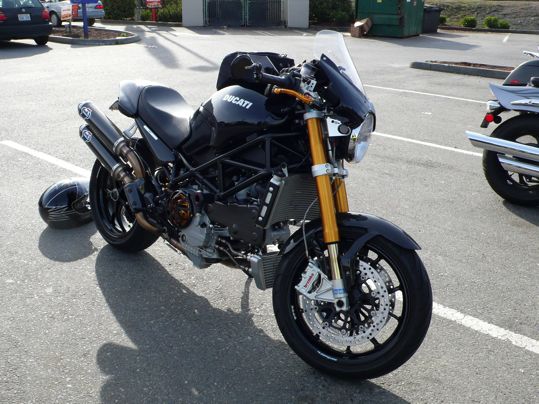
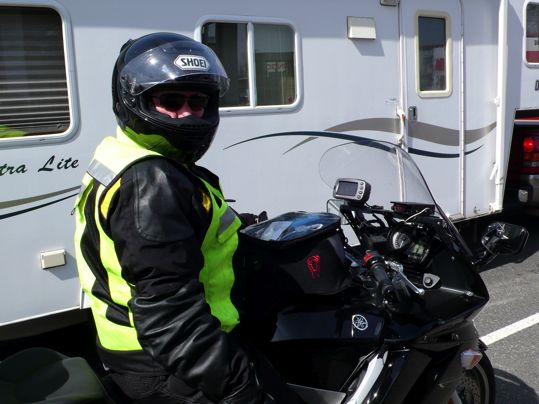
Then, the meetup place was rocked by a loud, molar-rattling rumble. We all strained our necks to see who was this Nike.
NIEHART!!! On a Ducati Monster. Hell Yeah!! Cletus, we gots us our Bandit!!
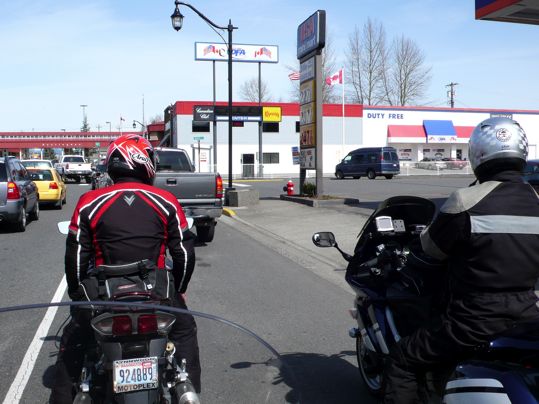
Taff handled logistics and made sure we had our story straight as we rode into Canada. If questioned about our purpose for visiting, we would all recite: "We are traveling into Canada to escape the socialist revolution being wrought by the great oppressor, Obama!"
We also practiced our "you lookin at me?" face in case the locals gave us any hassle. Crossing the border, we all made it in with no interrogations.
Then, things began to go awry. First, Niehart got confused about where the pharmacy was, and took to standing on the corner shouting out to passing motorists "Which way is the drugs?"
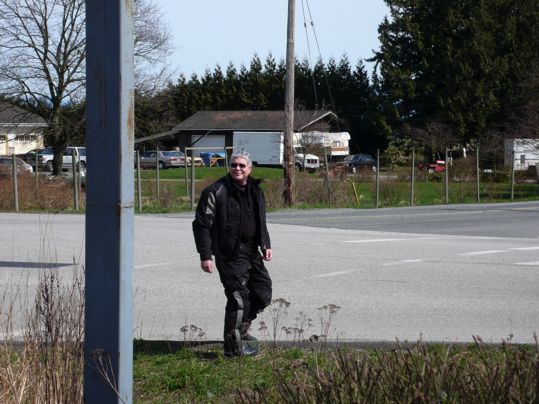
Dammit Niehart, focus! Eyes on the prize, Niehart, Eyes on the prize! Finally, we made it to the source of plentiful, over the counter tylenol with codeine, in super large size:
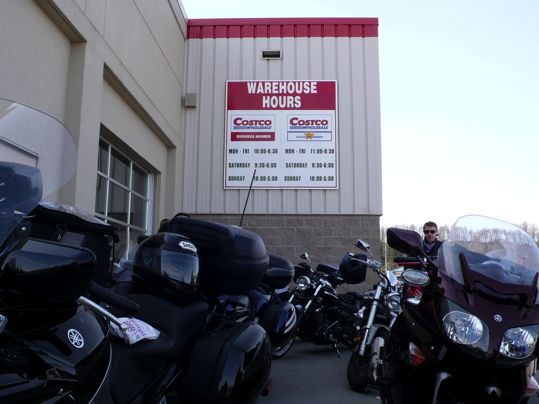
But we hadn't counted on how Canadian suburbanites would react to a gang of drug seeking motorcyclists. Things got uglier after we scored our first mega-bottle. When we got back to the parking lot, Achiu got this crazy look in eyes as he began to fully comprehend the possibilities inherent in a super size 222 stash:

Before I could stop him, he had pried off the child proof cap, made it through the cotton ball, and was chugging them painkillers like they was gummi bears:

[In best slow motion voice] : NOOOOHHHHHHHHHHHH.
We ran back into Costco and restocked with fresh loot, and made a mad dash through to the border.
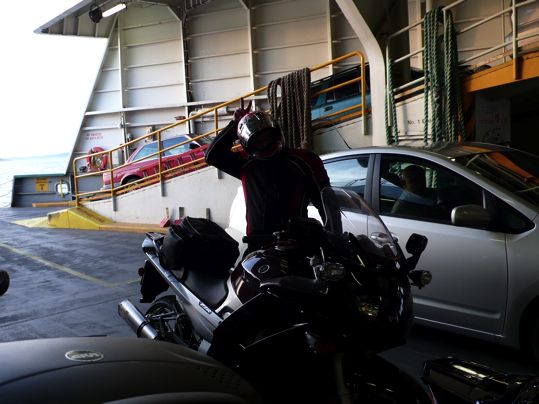
Taff had the bright idea to come back into the States through the ferry. They'd be too busy looking for dark skinned guys with funny names to notice a few bikers flashing crazy gang signs:

Thanks to fancy drivin by Niehart, and quick thinking by Taff, we made it home and none of the stash was lost or spoiled. As the ferry pulled into the dock, I sat around looking at the guys, taking in the day's accomplishment, and thinking "We got us a pretty damn good crew."

Next time, 333's, double or nothing.
Widget powered by EveryTrail: GPS Geotagging
Niehart and the Bandit
It started with a simple problem: my stash of 222's ran out, and with CFR around the corner, I needed to stock up. But bringing over-the-counter pain medication from Canada back to the states is frought with challenges: there is 1 bottle, 50 pill limit. I needed more, and I needed them Sunday.
What to do, what to do?
Good thing I was watching CMT; they were running a tv marathon that gave me an idea:
[Hint: the rest of the story works much better if you push play and listen to the soundtrack while reading]
A plan was hatched: make a dash to the border, get the stash, and make it back in time to enjoy drinks. But we needed a crew to run interference, and more important, we needed a chase bike. The route would be long and perilous, with mounties and smokies at every twisty. I went to bed hopeful but restless.
The next morning, Taff the Brit showed up with another delightful British couple. Could they be the Bandit?
We all know that Brits can't drive on the right side of the road. Too conspicuous. No dice. I'd have to wait to see who showed at the meetup:
One look at Achiu's multi-farkled heaviy laden Feejer and it was clear that he wasn't going to be the chase car. No, he'd be Snowman, responsible for getting the goods home safe.
And these guys weren't going to be of any help. Cheezus, who invited cruisers? (Oh wait, I did. I guess they would be useful in slowing down any pursuing Smokeys.)
What I needed was someone cool enough to not crack under pressure, but hooligan enough to run flat out if we got busted.
Then, the meetup place was rocked by a loud, molar-rattling rumble. We all strained our necks to see who was this Nike.
NIEHART!!! On a Ducati Monster. Hell Yeah!! Cletus, we gots us our Bandit!!
Taff handled logistics and made sure we had our story straight as we rode into Canada. If questioned about our purpose for visiting, we would all recite: "We are traveling into Canada to escape the socialist revolution being wrought by the great oppressor, Obama!"
We also practiced our "you lookin at me?" face in case the locals gave us any hassle. Crossing the border, we all made it in with no interrogations.
Then, things began to go awry. First, Niehart got confused about where the pharmacy was, and took to standing on the corner shouting out to passing motorists "Which way is the drugs?"
Dammit Niehart, focus! Eyes on the prize, Niehart, Eyes on the prize! Finally, we made it to the source of plentiful, over the counter tylenol with codeine, in super large size:
But we hadn't counted on how Canadian suburbanites would react to a gang of drug seeking motorcyclists. Things got uglier after we scored our first mega-bottle. When we got back to the parking lot, Achiu got this crazy look in eyes as he began to fully comprehend the possibilities inherent in a super size 222 stash:
Before I could stop him, he had pried off the child proof cap, made it through the cotton ball, and was chugging them painkillers like they was gummi bears:
[In best slow motion voice] : NOOOOHHHHHHHHHHHH.
We ran back into Costco and restocked with fresh loot, and made a mad dash through to the border.
Taff had the bright idea to come back into the States through the ferry. They'd be too busy looking for dark skinned guys with funny names to notice a few bikers flashing crazy gang signs:
Thanks to fancy drivin by Niehart, and quick thinking by Taff, we made it home and none of the stash was lost or spoiled. As the ferry pulled into the dock, I sat around looking at the guys, taking in the day's accomplishment, and thinking "We got us a pretty damn good crew."
Next time, 333's, double or nothing.
Canada
Installing the Admore light kit for Givi E460
29/03/09 13:02 Filed in: Farkles
Here's an overview of my install of the Admore
Lighting kit for my Givi E460 topmount case. Premier
Cycle Accessories has them for $129.
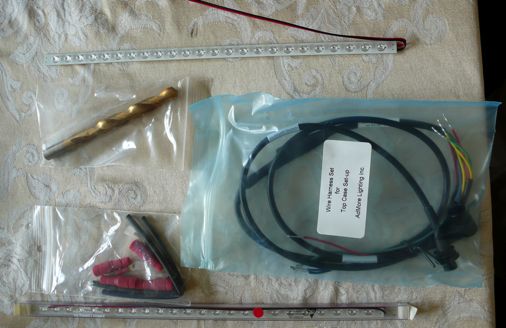
The kit: two LED strips and the harness kits, plus various positaps:
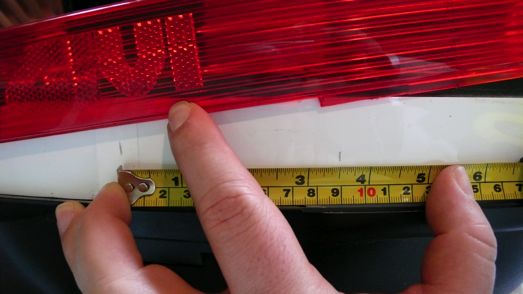
First task, loosen BUT DO NOT REMOVE the various screws holding the red lens from the Givi (loosen just enough to remove the lens): one on each side internally, and two holding the middle clamp on. Then, remove the lens carefully. Next, align the LED strips for each side by marking the center of the Givi, then measuring about 3 1/2" from the center on both the right and left side. This offset is where each LED strip will begin, and more important, where you will drill the small hole for the LED wiring to fit through:
Next, using a 5/32 drill bit, drill a small hole from the outside, at the spot you marked 3 1/2" from center . The Givi has two layers, like a honey comb. You should drill only the outer layer, to keep the inside watertight
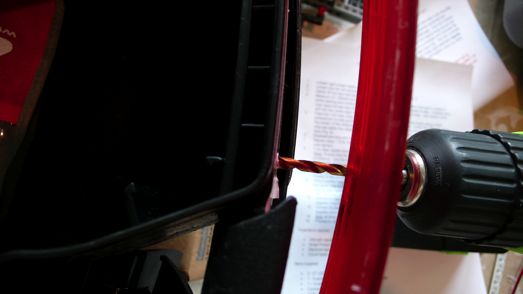
Feed the two wires through the hole. You can see below how they fit in between the layers:
Next, position the Admore LED strips on the Givi. You don't tape them, rather, the rear red lens has a channel in which the LED strips can fit. You carefully align the red lens with LED strips so that the LED strips fit into the channel when you snap the lens back onto the Givi.
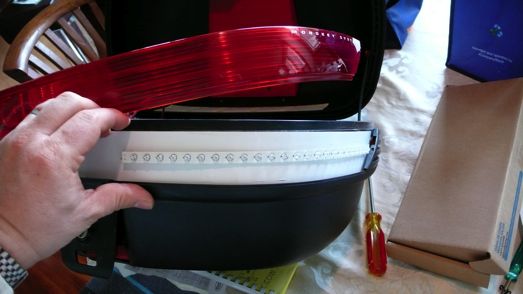
Repeat the same process for the other side, and install the screws and screw the lens back on. IMPORTANT: Do not overtighten, as you will crack the lens.
Finished LED strips:
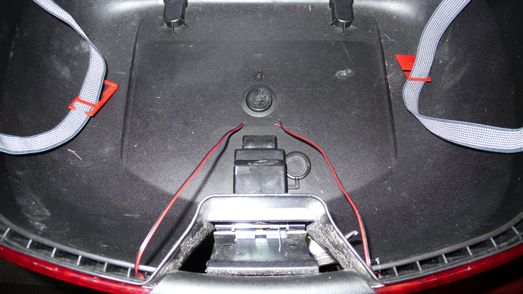
Next, you'll have to decide where to drill the hole for the wiring harness. Admore thoughtfully supplies the drill bit, and they suggest drilling into the front of the case (where the passenger's back will rest against. I laid the Givi on the rack and decided I would drill on the bottom towards the front. This way, the wiring would look clean and the harness would not interfere when I slid the Givi on the rack. One downside of this location: as you can see below, the inside of the wiring harness sticks up and you need to be careful not to place something heavy that could bend the wire.
The outside view of the harness, connected:

Inside View: (The electric tape on the side is temporary until I can get some black fabric tape:
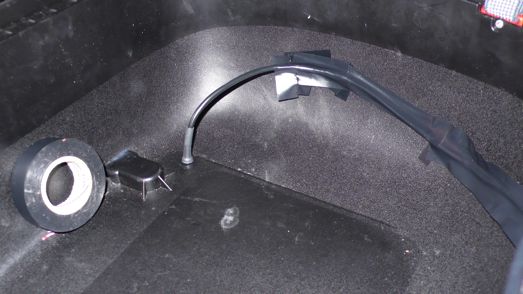
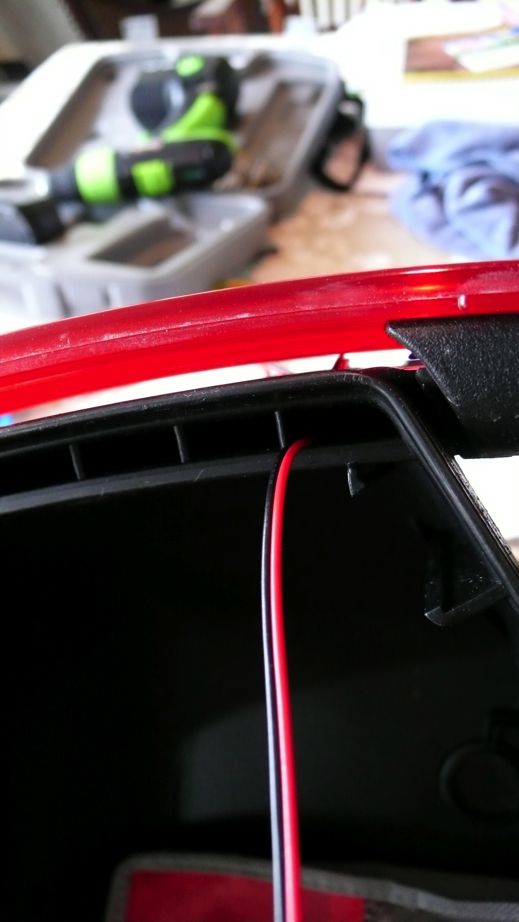
Finally, route the wiring harness into the FJR: I chose to run through the gap where the tank bags mount, rather than tuck under the rear seat:

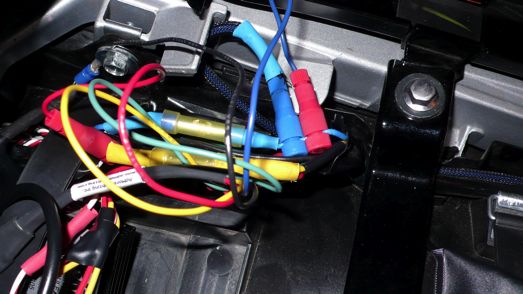
The most time consuming part is next: connecting all the wires together and then tapping into the wires on the FJR.
The first part of this task is easy: connect the red and black wires of the LED strips to the inside part of the wiring harness. I used Posilocks, but you can crimp/solder. The second part is the most time consuming part of the install, tapping into the FJR wires.
Here is the wiring chart applicable to my 2008 FJR, your FJR may be different:
Admore-------Function-------------FJR
Blue----------(Tail Light)------------Blue
Red----------(Brake light)-----------Yellow
Green---------(Right turn signal)------Green
Yellow--------(Left turn signal)--------Brown
Black (ground) I crimped to a spade and mounted to the bolt in the rear of the frame, viewable in the upper left corner of the image below.
There are various opinions on using Positaps versus cutting the wire and soldering or crimping. The only problems I've experienced with Positaps are that sometimes they don't pierce the wire; easily fixed, but annoying when you go to test the lights and they don't work. The other issue I have with positaps is the space they take up on the wiring harness, and how messy it looks:
But I have a solution: a great product found at Home Depot in the plumbing section: silicone tape:
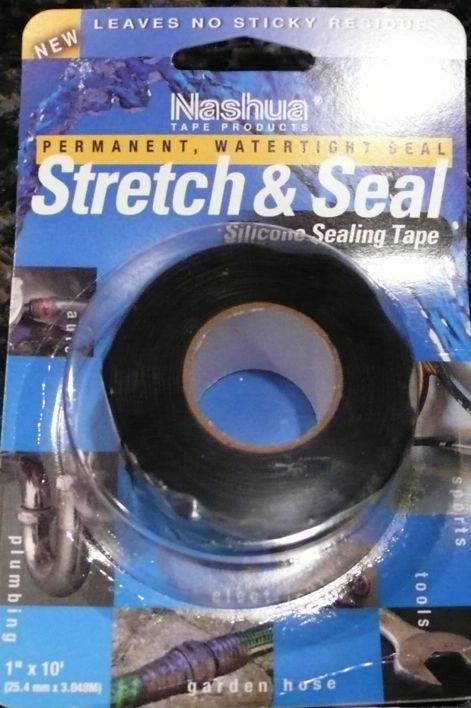
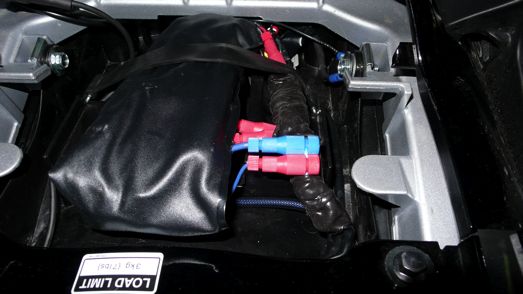
It is super stretchy, comes on a roll like a fruit rollup, and is elastic and sticky (too sticky, you will want to buy several rolls for backup). Properly dressed with silicone tape, you can organize the positaps and the tape seals out moisture too. And it makes the install look a whole bunch better:
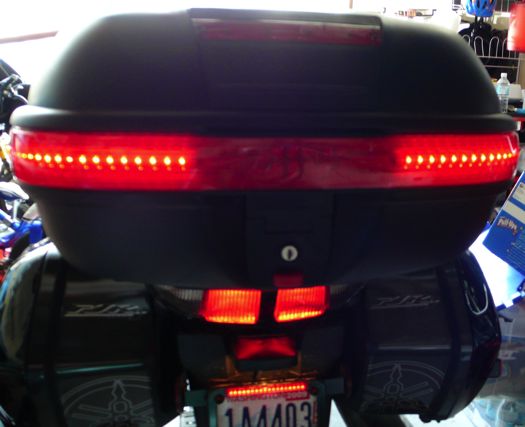
That is it! About 90 minutes or more if you want to make it look neat, and the Givi gains a great light kit. The Admore glows all the time with running lights, blinks each side for right or left turns, and the brake light is eye searingly bright at night. A great product, and many times brighter and more functional than the stock Givi lighting kit.
Running lights illuminating (also note the license plate LED's which are connected via a Signal Dynamics "Back Off" to blink when I apply the brakes):
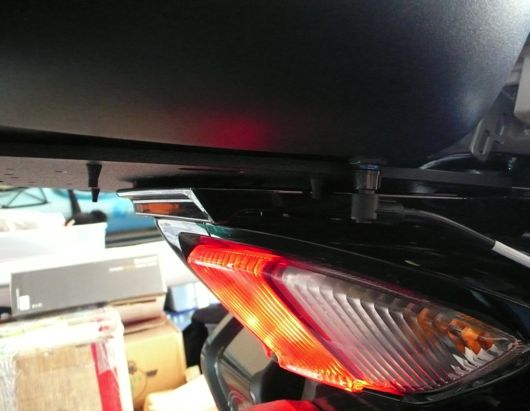
Side view showing where quick-disconnecting harness is mounted to the Givi:
The kit: two LED strips and the harness kits, plus various positaps:
First task, loosen BUT DO NOT REMOVE the various screws holding the red lens from the Givi (loosen just enough to remove the lens): one on each side internally, and two holding the middle clamp on. Then, remove the lens carefully. Next, align the LED strips for each side by marking the center of the Givi, then measuring about 3 1/2" from the center on both the right and left side. This offset is where each LED strip will begin, and more important, where you will drill the small hole for the LED wiring to fit through:
Next, using a 5/32 drill bit, drill a small hole from the outside, at the spot you marked 3 1/2" from center . The Givi has two layers, like a honey comb. You should drill only the outer layer, to keep the inside watertight
Feed the two wires through the hole. You can see below how they fit in between the layers:
Next, position the Admore LED strips on the Givi. You don't tape them, rather, the rear red lens has a channel in which the LED strips can fit. You carefully align the red lens with LED strips so that the LED strips fit into the channel when you snap the lens back onto the Givi.
Repeat the same process for the other side, and install the screws and screw the lens back on. IMPORTANT: Do not overtighten, as you will crack the lens.
Finished LED strips:
Next, you'll have to decide where to drill the hole for the wiring harness. Admore thoughtfully supplies the drill bit, and they suggest drilling into the front of the case (where the passenger's back will rest against. I laid the Givi on the rack and decided I would drill on the bottom towards the front. This way, the wiring would look clean and the harness would not interfere when I slid the Givi on the rack. One downside of this location: as you can see below, the inside of the wiring harness sticks up and you need to be careful not to place something heavy that could bend the wire.
The outside view of the harness, connected:
Inside View: (The electric tape on the side is temporary until I can get some black fabric tape:
Finally, route the wiring harness into the FJR: I chose to run through the gap where the tank bags mount, rather than tuck under the rear seat:
The most time consuming part is next: connecting all the wires together and then tapping into the wires on the FJR.
The first part of this task is easy: connect the red and black wires of the LED strips to the inside part of the wiring harness. I used Posilocks, but you can crimp/solder. The second part is the most time consuming part of the install, tapping into the FJR wires.
Here is the wiring chart applicable to my 2008 FJR, your FJR may be different:
Admore-------Function-------------FJR
Blue----------(Tail Light)------------Blue
Red----------(Brake light)-----------Yellow
Green---------(Right turn signal)------Green
Yellow--------(Left turn signal)--------Brown
Black (ground) I crimped to a spade and mounted to the bolt in the rear of the frame, viewable in the upper left corner of the image below.
There are various opinions on using Positaps versus cutting the wire and soldering or crimping. The only problems I've experienced with Positaps are that sometimes they don't pierce the wire; easily fixed, but annoying when you go to test the lights and they don't work. The other issue I have with positaps is the space they take up on the wiring harness, and how messy it looks:
But I have a solution: a great product found at Home Depot in the plumbing section: silicone tape:
It is super stretchy, comes on a roll like a fruit rollup, and is elastic and sticky (too sticky, you will want to buy several rolls for backup). Properly dressed with silicone tape, you can organize the positaps and the tape seals out moisture too. And it makes the install look a whole bunch better:
That is it! About 90 minutes or more if you want to make it look neat, and the Givi gains a great light kit. The Admore glows all the time with running lights, blinks each side for right or left turns, and the brake light is eye searingly bright at night. A great product, and many times brighter and more functional than the stock Givi lighting kit.
Running lights illuminating (also note the license plate LED's which are connected via a Signal Dynamics "Back Off" to blink when I apply the brakes):
Side view showing where quick-disconnecting harness is mounted to the Givi: